Table Of Content

If we only had the silhouette, we wouldn’t notice all these details, thus I need to contrast the different sections in order to highlight these shapes. Work on one part of the hair at a time, while following the general direction in which the strands flow. In dark areas, don’t be afraid to press hard (I used a 6B to 8B for these areas). To bring out highlights, flatten your kneaded eraser and swipe it in the desired direction. The eraser will become too dirty after the first swipe, so fold it in and flatten after each stroke. But a change in your approach can help you leave those fears behind.
Step 10
You should eventually have a line drawing with a good amount of details similar to the example above. If you are going to be follows this tutorial it’s best to do so using pencil and paper. Before you make people happy with your drawing, you have to make yourself happy with your final work and the process. Just draw the overall shape, and it will be your guide when you do the line art immediately or even paint it over, or you can detail it into a sketch first. So again, we'll first define the outer contour of the shape of the hair. And again, we can simplify this further into smaller shapes that describe the clumps.

How to Draw Curly Hair Step by Step
I’ve always thought that short, almost shaved hair feels like a carpet! And when I draw it, I like to give it a prickly, pointy, rough appearance. • The green area (1) indicates the gap between the head and the edge of the hair. Each hair comes from a specific point and grows in a different direction. Even when the hair is very long, the gravitational force eventually brings it down.
Step Two: Sketch locks of hair
Assuming that the structure of the head is in place, the first step is to define the outer contour or outline of the hair. This includes the lines that are formed as the hair overlaps the forehead, portions of the face, and the shoulders. In many cases, the hair lifts off of the cranium and may overlap much of the face. Of course, every head of hair is different and the contours that are drawn at this stage will be different for every subject. If the thought of drawing hair overwhelms you - you're not alone.
How to draw a nose from the front – 7 easy steps
Add in the smallest sets of hair splits, folds and clumps to finish the line drawing. Erase the hairline and parts of the head covered by the hair once done. Finish the drawing by further darkening and smoothing out the overall shading.
We'll still see contrast between darks and lights, but this will happen from layering instead of within each "clump" of hair. It clearly doesn't make sense to draw every strand of hair. Not only would this take an incredible amount of time to accomplish, but it also would lead to very unnatural looking hair. We'll define the volume of these forms in the next step, but for now we'll concentrate on defining the shapes.
Super Saiyan 3 Was A Struggle To Draw For Dragon Ball Z (And It's Not Because Of The Hair) - SlashFilm
Super Saiyan 3 Was A Struggle To Draw For Dragon Ball Z (And It's Not Because Of The Hair).
Posted: Sat, 13 Aug 2022 07:00:00 GMT [source]
How to Draw Natural Looking Hair Step by Step
The lines in the examples have been made slightly darker just so that they are easier to see. I may be defining this process as a four-step approach, however it's more like a three-step approach. The third and fourth steps are combined and are executed at the same time. Before we begin the process of drawing the hair, we need to be sure that the structure of the head is drawn in place. The structure of the head dictates the shape and flow of the hair and should be defined before we begin drawing the hair. To do this, move your pencil to the hair part and draw several lines in the direction of where the hair grows.
thoughts on “How to draw realistic hair: The ultimate tutorial”

As is the case with any subject that you draw, practice is important. The more that we practice with a particular subject, the better we understand it. Drawing a whole head of hair will give you lots of practice. However for some, the thought of doing this may be intimidating. Instead, it may be better to tackle a portion of the hair first.
We draw the overlap by shading in these areas which are produced from a line that generally runs through a series of lines going in a single direction. I am using my kneaded eraser just as much as I use my pencil throughout this drawing. It's a fantastic tool for drawing hair because it can be used to pick out specific details, or to lighten larger areas of value. Watch this video tutorial on my three favorite kneaded eraser techniques for realistic drawing here. Adding realistic hair to a portrait can make it come to life.
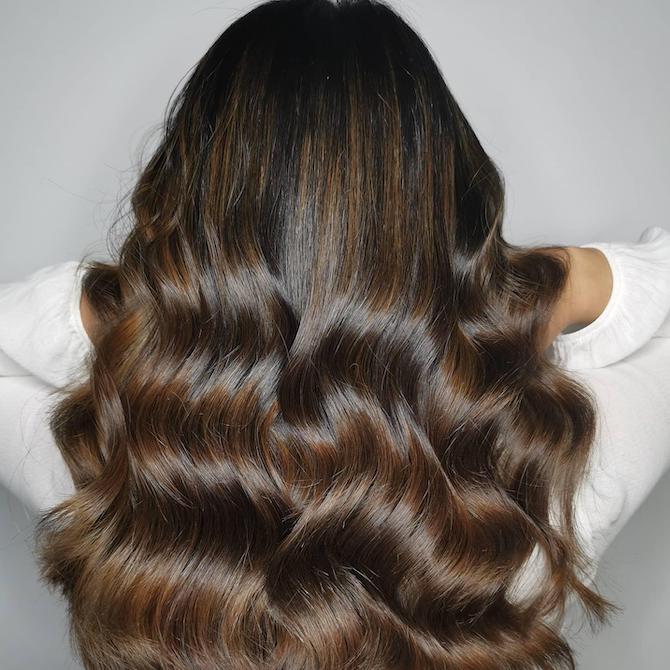
These lines can vary in length, from long to short, just so long as they follow the hairstyle. For our hair drawing reference, we will be using an image of a female as her hair provides us with a unique challenge. The curls and brunette coloring of her hair have various tonal values that sit on the tonal spectrum between dark and light. With all our materials ready we can now begin our hair drawing process. Slowly darken the drawing by applying more layers of overlapping strokes. Be sure to leave some space between them to create an effect of individual hairs.
It's totally understandable if you're feeling intimidated, but we've got you covered! We'll help you break the process down into manageable steps and add details one layer at a time to achieve realistic-looking hair in your drawings. Read on for a detailed guide on outlining, sketching, shading, highlighting, and more. This essential practice presents the ultimate challenge to the artist and once mastered, opens up a world of possibilities.
For most people with long hair, you can expect at least 2 centimeters of “hair height” on top of their actual height and at least 2 centimeters on the sides as well. Learning how to draw realistic hair is about realizing what hair actually is. Hair is a series of fine lines that move in a particular direction. However, that motion can change which is what we see in curly hair.


No comments:
Post a Comment